How to Use Computer Embroidery: A Complete Guide for Beginners
Computer embroidery has revolutionized the world of textile arts, offering a blend of technology and creativity that allows even beginners to create intricate designs with ease. Whether you’re looking to personalize clothing, create custom gifts, or start a small business, understanding how to use computer embroidery is an invaluable skill. This guide will walk you through the essentials, from choosing the right equipment to mastering basic techniques.
Understanding the Basics of Computer Embroidery
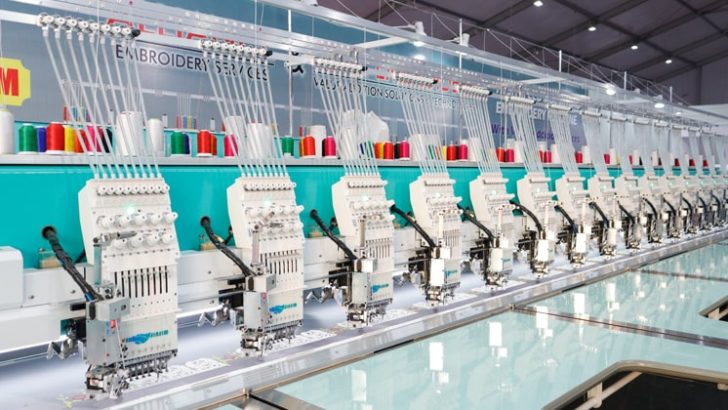
Computer embroidery involves using specialized software to design patterns, which are then transferred to an embroidery machine. These machines use digital instructions to stitch the design onto fabric. Unlike traditional hand embroidery, which requires manual stitching, computer embroidery automates the process, making it faster and more precise.
The first step in learning computer embroidery is familiarizing yourself with the key components of the system. These typically include an embroidery machine, a computer or tablet, and embroidery software. The embroidery machine can be either a standalone unit or a USB-compatible model that connects directly to your computer. The software allows you to create, edit, and customize designs before sending them to the machine.
Choosing the Right Equipment
Selecting the right equipment is crucial for a successful embroidery experience. When purchasing an embroidery machine, consider factors such as the size of the hoop, the number of needles, and the type of stitching capabilities. For beginners, a mid-range machine with a 4×4 inch hoop is often sufficient. It’s also important to check if the machine is compatible with the software you plan to use.
In addition to the machine, you’ll need a variety of materials, including stabilizers, threads, and fabrics. Stabilizers help prevent puckering and ensure that the design stays in place during stitching. Threads come in different weights and colors, so it’s essential to choose ones that match your project. Fabrics vary in texture and thickness, so experimenting with different types will help you understand how they respond to embroidery.
Getting Started with Embroidery Software
Embroidery software is the heart of the computer embroidery process. Popular options include Embird, Wilcom, and PE Design, each offering unique features and user interfaces. Most software allows you to import images, convert them into embroidery designs, and adjust elements like color, size, and stitch density.
For beginners, it’s best to start with pre-designed templates rather than creating your own. Many software programs offer libraries of free or paid designs that you can customize. As you gain confidence, you can experiment with digitizing your own images or using vector graphics to create original patterns.
Learning Basic Techniques
Once you have your equipment and software set up, it’s time to learn some fundamental embroidery techniques. One of the most important steps is hooping the fabric correctly. The hoop should be tight enough to hold the fabric securely but not so tight that it stretches the material. Proper hooping ensures that the design stitches evenly and without distortion.
Another essential technique is selecting the right thread tension. Too much tension can cause the thread to break or pucker, while too little can result in loose stitches. Most machines have adjustable tension settings, and practicing on scrap fabric can help you find the optimal setting for your project.
Customizing Your Designs
One of the greatest advantages of computer embroidery is the ability to customize designs. You can change colors, add text, or modify the size of a pattern to suit your needs. Some software even allows you to combine multiple designs into a single project, creating complex and personalized pieces.
When customizing, pay attention to the limitations of your machine. For example, certain machines may have restrictions on the maximum number of stitches or the complexity of the design. Always test your design on a small area before committing to the full project.
Troubleshooting Common Issues
Even with the best preparation, issues can arise during the embroidery process. Common problems include skipped stitches, thread breaks, and misaligned designs. Skipped stitches often occur when the needle is dull or the thread is tangled. Regularly replacing needles and keeping the machine clean can prevent these issues.
If your design is misaligned, double-check that the hoop is properly secured and that the machine’s sensors are functioning correctly. Thread breaks can be caused by using low-quality thread or incorrect tension settings. Investing in high-quality thread and adjusting the tension as needed will improve the quality of your work.
Expanding Your Skills
As you become more comfortable with computer embroidery, you can explore advanced techniques such as layering, shading, and using different types of stitches. Layering involves adding multiple layers of stitching to create depth, while shading uses varying thread colors to simulate gradients.
You can also experiment with combining embroidery with other crafts, such as quilting or applique, to create unique and multifaceted projects. Joining online communities or taking classes can provide additional inspiration and support as you continue to develop your skills.
With patience, practice, and the right tools, computer embroidery offers endless creative possibilities. Whether you’re a hobbyist or aspiring entrepreneur, mastering this craft can open up new opportunities and bring your artistic vision to life.
