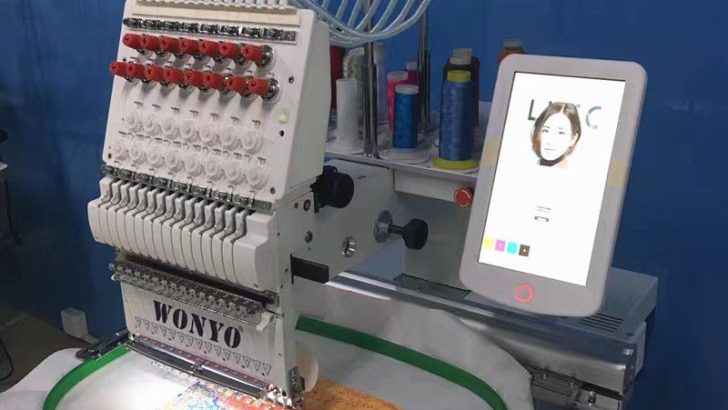
Computer embroidery has become a popular craft among hobbyists and professionals alike, offering a blend of technology and artistry that allows for intricate and personalized designs. For beginners in the United States, starting with computer embroidery can be both exciting and overwhelming. This tutorial aims to guide you through the basics, from selecting the right tools to creating your first embroidered project. Whether you’re looking to personalize clothing, create custom gifts, or start a small business, this step-by-step approach will help you get started on the right foot.
Understanding the Basics of Computer Embroidery
Before diving into the technical aspects, it’s essential to understand what computer embroidery entails. Unlike traditional hand embroidery, which relies solely on manual stitching, computer embroidery uses specialized software and machines to automate the process. The design is created digitally, then transferred to an embroidery machine that stitches the pattern onto fabric. This method not only saves time but also allows for greater precision and complexity in designs.
To begin, you’ll need a few key components: an embroidery machine, embroidery software, and the right materials. In the United States, brands like Brother, Singer, and Janome offer a range of embroidery machines suitable for beginners. These machines typically come with built-in designs and the ability to load custom patterns. As for software, options like Embird, Wilcom, and Hatch provide user-friendly interfaces for designing and editing embroidery files.
Choosing the Right Tools and Materials
Selecting the appropriate tools and materials is crucial for a successful embroidery experience. Start by choosing an embroidery machine that fits your budget and needs. If you’re just starting out, a basic model with a hoop and a few preloaded designs may be sufficient. However, if you plan to expand your skills, consider a more advanced machine with larger hoop sizes and additional features.
Next, invest in high-quality embroidery threads and stabilizers. Threads come in various colors and types, including polyester, rayon, and cotton. Stabilizers are used to support the fabric during stitching, preventing puckering and distortion. There are different types of stabilizers, such as cutaway, tearaway, and water-soluble, each suited for specific fabrics and projects.
In addition to the machine and materials, you’ll need a reliable computer or tablet to run the embroidery software. Most modern computers can handle basic embroidery programs, but ensure your device meets the system requirements specified by the software provider.
Learning the Software and Designing Your First Project
Once you have your tools ready, it’s time to familiarize yourself with the embroidery software. Most programs allow you to import images, convert them into embroidery designs, and adjust settings like stitch density and color changes. Beginners can start by using pre-designed templates available online or within the software itself. These templates can be customized to fit your preferences, making it easy to create unique pieces without advanced design skills.
To design your first project, follow these steps:
1. Open your embroidery software and select a template or upload an image.
2. Adjust the size and position of the design to fit your fabric.
3. Choose the appropriate thread colors and set the stitch type.
4. Preview the design to ensure it looks as intended.
5. Save the file in the correct format for your embroidery machine.
Stitching Your First Embroidery Project
After finalizing your design, transfer the file to your embroidery machine. Most machines use USB drives or memory cards to load designs, so check your machine’s manual for specific instructions. Once the design is loaded, place your fabric in the hoop and secure it tightly. Make sure the fabric is taut to prevent shifting during stitching.
Begin the embroidery process by following the machine’s on-screen prompts. The machine will automatically stitch the design onto your fabric. Monitor the process to ensure everything runs smoothly, and make adjustments if needed. After completing the project, carefully remove the fabric from the hoop and trim any excess stabilizer or threads.
Tips for Success and Troubleshooting
As you continue practicing, keep these tips in mind to enhance your embroidery experience:
– Always test your design on a scrap piece of fabric before working on your final project.
– Use the correct needle and thread for your fabric type to avoid breakage or pilling.
– Keep your machine clean and well-maintained to ensure consistent performance.
If you encounter issues, such as skipped stitches or uneven tension, refer to your machine’s troubleshooting guide or seek help from online forums and communities. Many embroidery enthusiasts are willing to share their knowledge and offer solutions to common problems.
With patience and practice, you’ll soon be able to create beautiful, personalized embroidered pieces that reflect your creativity and skill. Whether you’re crafting for personal enjoyment or professional purposes, computer embroidery offers endless possibilities for expression and innovation.
