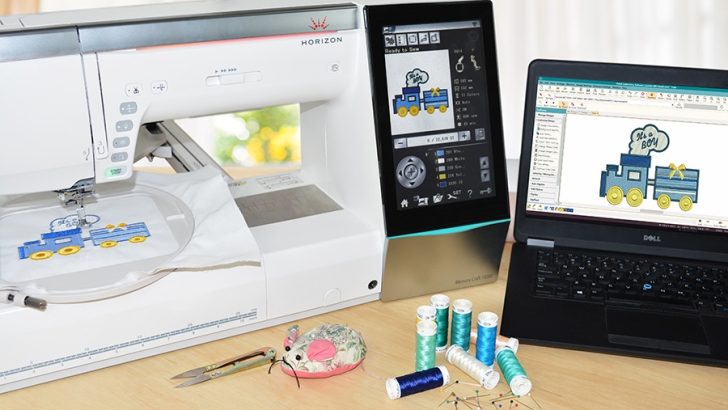
Digital embroidery has become a popular craft for both hobbyists and professionals, offering a blend of traditional artistry with modern technology. With the right tools and techniques, anyone can create stunning designs at home, making it an accessible and rewarding activity. Whether you’re looking to personalize clothing, create unique gifts, or explore a new creative outlet, digital embroidery opens up a world of possibilities. This guide will walk you through the basics of digital embroidery, from selecting the right equipment to mastering design software and bringing your ideas to life.
Getting Started with Digital Embroidery
Before diving into the creative process, it’s essential to understand the key components of digital embroidery. The first step is acquiring the necessary tools. A digital embroidery machine is the heart of the operation, and there are various models available depending on your budget and skill level. These machines range from basic home-use models to advanced industrial-grade systems, each offering different features and capabilities. For beginners, a compact and user-friendly model is ideal, as it allows you to experiment without overwhelming complexity.
In addition to the machine, you’ll need embroidery software to design and edit your patterns. Popular options include Wilcom, Hatch, and Embird, each with its own set of features and learning curves. Some software programs are specifically tailored for beginners, while others offer more advanced customization options. It’s important to choose a program that aligns with your goals and provides a smooth workflow.
Understanding the Design Process
Creating a digital embroidery design involves several steps, starting with conceptualizing your idea. Whether you’re inspired by nature, culture, or personal experiences, the first step is to sketch out your vision. Once you have a clear concept, you can begin translating it into a digital format using your chosen software. Most embroidery programs allow you to import images, convert them into stitchable patterns, and adjust elements like color, size, and density.
One of the most critical aspects of the design process is understanding how stitches work. Different types of stitches—such as satin, fill, and running stitches—produce varying textures and effects. Experimenting with these stitches can help you achieve the desired look for your project. Additionally, considering the fabric type is essential, as certain materials may require specific settings or stabilizers to prevent puckering or distortion.
Choosing the Right Materials
The quality of your final embroidery depends heavily on the materials you use. Selecting the appropriate fabric is crucial, as it affects how the stitches adhere and how the design appears. Common choices include cotton, linen, and denim, each with its own characteristics. For example, cotton is versatile and easy to work with, while denim offers durability and a textured finish.
Stabilizers are another important component in digital embroidery. These materials provide support to the fabric during the stitching process, preventing it from shifting or stretching. There are different types of stabilizers, such as tear-away, cut-away, and water-soluble, each suitable for specific projects. Using the right stabilizer ensures that your design remains crisp and professional-looking.
Tips for Successful Projects
To enhance your digital embroidery experience, consider the following tips:
- Start Simple: Begin with small projects to familiarize yourself with the machine and software. As you gain confidence, you can tackle more complex designs.
- Experiment with Colors: Don’t be afraid to mix and match colors to create unique visual effects. Many embroidery machines allow for multiple thread colors in a single design.
- Maintain Your Equipment: Regular cleaning and maintenance of your embroidery machine will ensure consistent performance and extend its lifespan.
- Join Online Communities: Engaging with other embroidery enthusiasts through forums or social media groups can provide valuable insights, inspiration, and troubleshooting advice.
Exploring Creative Possibilities
Once you’ve mastered the basics, the creative possibilities are endless. You can personalize items such as T-shirts, tote bags, and aprons with custom designs, making them perfect for gifts or personal use. Additionally, digital embroidery can be used for decorative purposes, such as creating wall art or embellishing home decor items. The ability to replicate designs quickly also makes it ideal for small-scale production or custom orders.
For those interested in expanding their skills, advanced techniques like multi-needle embroidery, 3D effects, and hybrid projects (combining digital and hand embroidery) offer new challenges and opportunities. These methods allow for greater artistic expression and can elevate your work to a professional level.
With dedication and practice, digital embroidery can become a fulfilling and expressive hobby. By following the steps outlined in this guide, you’ll be well on your way to creating stunning designs that reflect your creativity and craftsmanship. Whether you’re a beginner or an experienced artisan, the world of digital embroidery is waiting for you to explore.
